Descripción General
Steps to follow to build a project as a library for both Android and iOS as well as the code segments to be used for communication between native and Unity modules
Guía de trabajo
iOS
As a base you can use the example published by Unity-Technologies that contains a native xcode project as well as a unity project to perform the tests:
The Unity project is compiled in a normal way for iOS generating an XCode project called Unity-iPhone
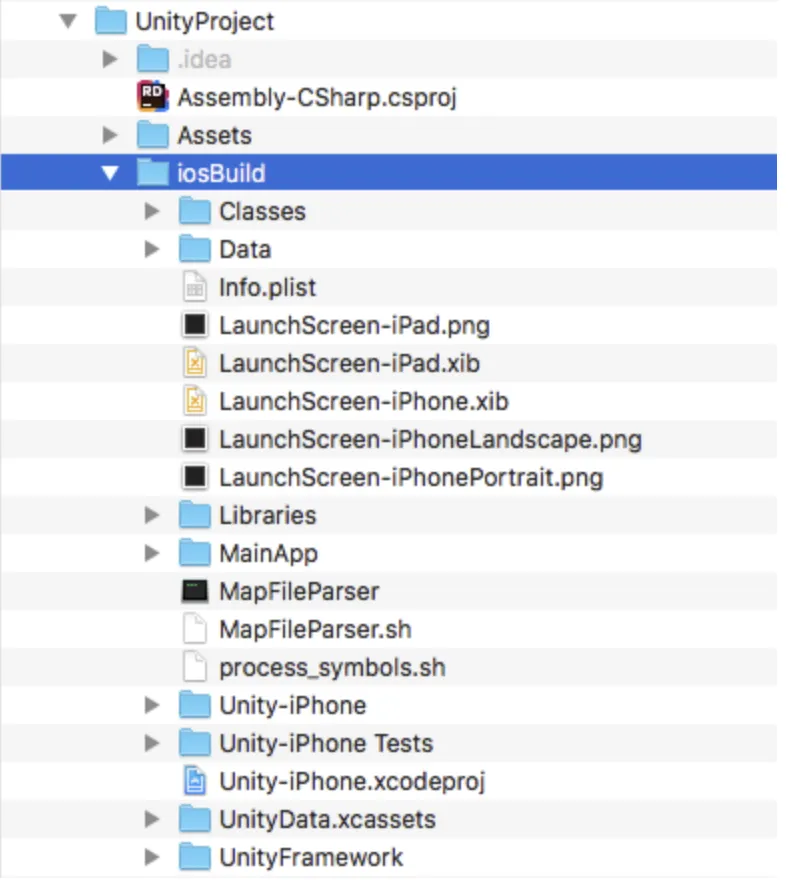
From our native iOS project a new workspace should be generated (File / New / Workspace)

We then open this new workspace and we add the two projects, the native xcode and unity ( File / Add Files to "both" )

Select the native application and add Unity-iPhone/UnityFramework.framework

- On "Build Phases", open "Link Binary With Libraries"
- Eliminate UnityFramework.framework from the list

- In the project browser, you will find Unity-iPhone / Libraries / Plugins / iOS / NativeCallProxy.h
- Enable UnityFramework in Target Membership and change the option from "project" to "public"

- In the folder "Data de Unity-iPhone" change "Target Membership" to "UnityFramework"

- select NativeiOSApp scheme to run the native application with the integrated unity project


INTRA-APP COMMUNICATION
To send a message from the native application to the unity module we must use sendMessage as shown in the "MainViewController.mm" script of the native application:
- (void)sendMsgToUnity
{
[[self ufw] sendMessageToGOWithName: "Cube" functionName: "ChangeColor" message: "yellow"];
}
Where "Cube" is the name of the class that we will access inside unity (it must be a class assigned to a GameObject instantiated in the scene), "ChangeColor" is the name of the method or function to be executed and "yellow" is the parameter that this function receives, as a string.
Código de c# en unity: public class Cube : MonoBehaviour {
void ChangeColor(string newColor) {
if (newColor == "red") GetComponent<Renderer>().material.color = Color.red; else if (newColor == "blue") GetComponent<Renderer>().material.color = Color.blue; else if (newColor == "yellow") GetComponent<Renderer>().material.color = Color.yellow; else GetComponent<Renderer>().material.color = Color.black; }
}
Android
The example published by Unity-Technologies containing a native android project as well as a unity project can be used as a basis for testing:
Generate an android gradle project from the unity Player Settings
- Select as platform: Android
- Select the "Export Project" option

- Open your native project in Android Studio
- Open the settings.gradle file
- add a new project pointing to the unityLibrary module at the end of the file:

    include ':unityLibrary'
    project(':unityLibrary').projectDir=new File('..\\UnityProject\\androidBuild\\unityLibrary') La ruta debe ser exactamente la del proyecto generado por Unity

- Open the build.gradle file(Module: app)
- Add the following in dependencies: { block
    implementation project(':unityLibrary')
    implementation fileTree(dir: project(':unityLibrary').getProjectDir().toString() + ('\\libs'), include: ['*.jar'])

- Open the build.gradle file(Project: NativeAndroidApp)
- Add the following to allprojects{repositories{ block
    flatDir {
      dirs "${project(':unityLibrary').projectDir}/libs"
    }

- Click on Sync Now to synchronize the project with the changes madE

- Now the project generated by unity must have been added as a library to your native project


INTRA-APP COMMUNICATION
- To send a message from the native application to the unity module we must use UnitysendMessage as shown in the "MainUnityActivity.java" script of the native application:
{
    Button myButton = new Button(this);
    myButton.setText("Send Msg");
    myButton.setX(320);
    myButton.setY(500);
    myButton.setOnClickListener( new View.OnClickListener() {
        public void onClick(View v) {
            mUnityPlayer.UnitySendMessage("Cube", "ChangeColor", "yellow");
        }
    });
    layout.addView(myButton, 300, 200);
}
Code of c# in unity:
public class Cube : MonoBehaviour {
void ChangeColor(string newColor) {
if (newColor == "red") GetComponent<Renderer>().material.color = Color.red; else if (newColor == "blue") GetComponent<Renderer>().material.color = Color.blue; else if (newColor == "yellow") GetComponent<Renderer>().material.color = Color.yellow; else GetComponent<Renderer>().material.color = Color.black; }
}
WebGL
INTRA-APP COMMUNICATION
Javascript code outside Unity
onclick="unityInstance.SendMessage('Cube', 'ChangeColor', 'yellow')"
- Código de c# en unity:
public class Cube : MonoBehaviour {
void ChangeColor(string newColor) {
if (newColor == "red") GetComponent<Renderer>().material.color = Color.red; else if (newColor == "blue") GetComponent<Renderer>().material.color = Color.blue; else if (newColor == "yellow") GetComponent<Renderer>().material.color = Color.yellow; else GetComponent<Renderer>().material.color = Color.black; }
}
Requirements
Requirements:
Android
- Android Studio 3.4.2+
- Unity version 2019.3.0b4+
iOS
- Xcode 9.4+
- Unity version 2019.3.0b11+, 2020.1.0a13
Download links
https://github.com/Unity-Technologies/uaal-example
Attachments
Comments
The android and iOS experts in charge of doing the integration can review the sample project to check references in the code that may have been omitted.
Advantages
To be able to integrate a unity project into native applications that require functions more easily developed in Unity such as RA, 3D object manipulation, physics, video games in general.
Limitations
While tested many scenarios for Unity as a library hosted by a native app, Unity does not control anymore the lifecycle of the runtime, so we cannot guarantee it'll work in all possible use cases. For example:
- Unity as a Library supports rendering only full screen, rendering on a part of the screen isn’t supported.
- Loading more than one instance of the Unity runtime isn’t supported.
- You may need to adapt 3rd party Plug-ins (native or managed) to work properly
- Overhead of having Unity in unloaded state is: 90Mb for Android and 110Mb for iOS
Elaboró
Erik Marmolejo Ensastegui